THE DEVIL’S IN THE DETAILS: Preparing your truck for resale
How to clean your pickup to get the highest return on your investment when it comes time to trade-in or sell
By Larry Walton
Chances are you’ve had your current pickup longer than you normally would, but now you’re thinking about an upgrade.
You may also have an extra pickup or two in the fleet that you need to convert into cash.
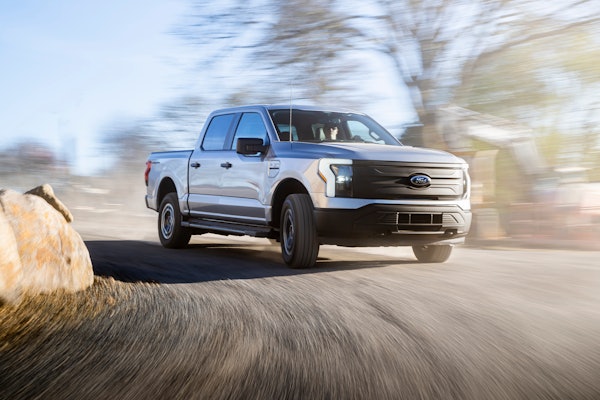
 Getting ready to sell a pickup? Make it look its very best by getting into the details of detailing.Either way, preparing and selling the pickup on your own can make a big difference to what you get out of the transaction.
The two most common ways to sell a pickup are trade-in at the dealership and private party.
When you check a pricing guide such as Kelley Blue Book, you’ll see that you can expect to get more for your pickup in a private party transaction.
Each of these transactions requires a different preparation of the pickup.
DOWN AND DIRTY
The guys at the dealership are pretty forgiving when it comes to a pickup’s cleanliness.
It’s common for customers to stop by on a whim to kick some tires. They end up test driving a pickup and the next thing they know someone is inspecting their old truck as a trade-in.
“I can see past dirt,” says Dustin Wallace, Finance Manager of Dollar Buick GMC in Medford, Oregon. “What I’m looking for is obvious body damage, interior rips and stains, and the condition of the tires.”
Since the dealer has their own mechanics and detailers, they are more concerned about the trucks overall condition, mechanical operations and up-to-date service records. Finance Managers like Wallace have to decide what it will take to re-market a pickup.
That’s not to say that the dealer prefers dirty pickups. In fact, you should plan your vehicle purchases, research the Kelley Blue Book [kbb.com] value of your vehicle and make sure it’s clean and all the little things are in good operating condition before visiting your dealer.
Pay particular attention to carpet and upholstery stains and minor paint scrapes.
A little stain removal effort and polishing compound use can remove the doubts an inspector may have about whether or not they can easily correct a blemish. There could be a couple of hundred dollars in added value to a cleaner trade-in.
PRIVATE PARTY POLISH
But the real money and the bigger preparation job come with a private party sale of your pickup, which can get you 30% over what you could get as a trade-in.
A very clean pickup will net even more.
 Turtle Wax recommends that you use their polishing compound in a back and forth motion. Polishing compound hazes and must be buffed off similar to wax applications. Wax is still needed after the polishing.
Additionally, a detailed pickup will give you an advantage over others trying to sell their dirty pickups on the local market.
Getting your rig ready for a private party offering will mean more time and a determined devotion to detail.
The idea behind a super clean pickup is to give it that TLC look. If it does clean up well, that means, other than a coating of dust, you did take good care of it.
You can start with a thorough wash job and you may have to begin your wash job a little differently than your neighbor because of your pickup’s use in the dirt moving industries.
Use a single-purpose, brass spray nozzle with a tight jet pattern to blast off caked-on mud. Use the nozzle inside the fender wells and on the springs and axles as well. Blast into the backside of the bumpers and around the spare tire. Years of jobsite and rock pit use can accumulate enough material to resurface a driveway.
Next clean the engine bay. A product like Black Magic 2-in-1 Engine Shine blackmagicshine.com simply sprays on and rinses off.
Be careful to keep water pressure and water volume low when rinsing and stay away from air intakes and electrical connections as much as possible.
After cleaning the engine bay, it’s time for a good old fashioned car wash by hand.
 Use a stiff bristle brush to scrub tire sidewalls.
Use a good car wash product like Maguiar’s meguiars.com and a shower style nozzle, which lays a lot of water on the pickup surface without bouncing it off. Start at the top and work your way down.
Take a section at a time and rinse before moving on to the next section. Roof, windshield, rear window, hood, front grill, tailgate and rear bumper. Change wash water. Front driver fender, front door, rear door, rear quarter panel. Change wash water, repeat on the passenger side.
As you clean each area, keep in mind that this wash job differs from your run-of-the-mill pickup washes by attention to detail at the seams, around lights and name plates. Work your wash rag into those areas.
The next exterior detail treatment is polishing compound as needed.
Most polishing compounds have a minor abrasive designed to remove surface contaminates that washing couldn’t handle.
Be cautious with such compounds and start with the least aggressive types. Some pickups require a clear-coat-safe product.
You can use polishing compound to remove door ding paint left by other drivers, minor scratches and overspray.
Next comes wax or other paint protection product. Over time the surface of your pickup’s paint becomes more and more porous, which leaves it vulnerable to corrosive elements in the environment.
Wax is designed to fill the pores and create a protective barrier on the paint surface. It also gives a for-sale rig a nice shine.
After completing the exterior, it’s time to turn your attention to the car’s interior. Empty all of the stuff from the handy storage compartments, door pockets, under-seat and behind the back seat areas. Remove the floor mats. Vacuum everything thoroughly.
Use the small crevice vac attachment and get the leftover lunch crumbs and dog hair from between and under the seats.
Wipe down the dash, door panels and seats with a damp cloth. Now have a look because this is where the detail comes in. Notice where dust has accumulated around the switches and seams in the dash and door panels. Note any stains on the carpet and seats.
These will all need to be addressed before you apply protectants to the plastics, fabrics and leather.
A small paint brush (we used a 2 1/2″ trim brush) works great for getting into the seams of door and dash panels and around the buttons and switches.
The bristles reach into these hard-to-reach areas. Dip the bristles frequently in soapy water and rinse. Shake out excess water so the bristles are merely damp. Depending on the amount of dust, which can be significant on many or our pickups, you may need to go over some areas a couple of times.
After thoroughly cleaning all of the plastics and vinyl areas, apply a protectant such as Prolong or Armor All. Note: Do not spray protectant on the steering wheel, control pedals or seat cushions, which can make these surfaces slick and impede safe vehicle operation.
If necessary, use a commercial product designed for stain removal on fabric seats and carpet. Leather can be cleaned with a leather cleaner/conditioner.
Finally, clean the glass with a quality glass cleaner inside and out.
In times like these a little attention to detail can mean a big difference to those looking for a clean machine.