Play by the rules & ruler when towing with pickups; using a weight-distribution hitch keeps you out of the liability issue
by G.W. Whale
Chances are you’ve seen, along some highway, a trailer on its side with cargo littering the landscape.
If the driver’s lucky, it was only his trailer and pickup that got damaged, because a large majority of them aren’t towed properly with a weight-distributing hitch.
You think your pickup pulls a trailer quite well in your estimation, so why bother with a weight-distributing hitch setup that might add 60 seconds to your hookup routine? You’d be better to ask, “why not?”
Trailer ratings are one of the primary parameters in pickup manufacturers’ battle for supremacy – or owners’ bragging rights – but they’re frequently just that, a rating.
What your truck can realistically tow – be it stock or modified in some fashion – is usually less than the rating; among other things, those ratings don’t usually include the weight of the hitch or hardware, cargo or passengers.
Those receiver-pull (a.k.a. “conventional” towing as opposed to gooseneck or fifth-wheel) ratings also have an asterisk or footnote emphasizing that above a certain trailer and/or tongue weight, a weight-distributing hitch must be used.
 Even though your pickup may be rated to tow heavy loads, it’ll need to use a W-D hitch on any trailered load weighing more than 5,000 pounds to stay out of liability troubles
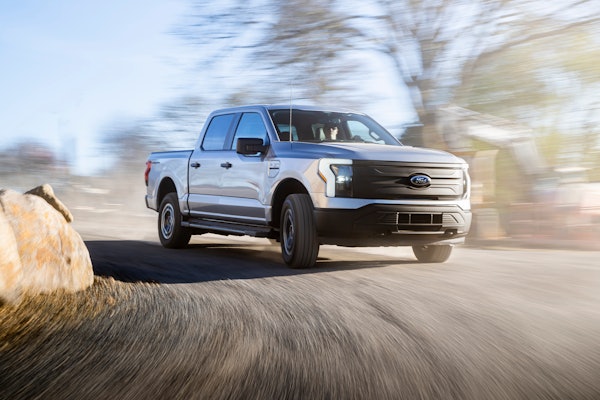
For instance, the 2011 Ram HD pickups list a weight-distribution hitch as required for trailers weighing more than 5,000 pounds. Ford’s 2011 SuperDuty Towing Guide has the footnote right at the header, “Maximum loaded trailer weight requires weight-distribution hitch.”
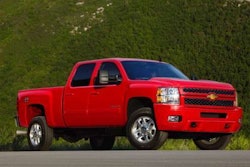
Chevrolet’s 2011 Trailering Guide requires weight-distribution for any trailer that, when loaded, will weigh more than 5,000 pounds.
It doesn’t even mention weight-carrying hitches for towing more than that.
Weight-distribution guidelines also apply to pre-2011 models, often with lower thresholds since earlier trucks towed less.
All the listings we found say also to check with your dealer regarding required towing equipment.
But from what we’ve observed at RV, boat and truck shows, read the owner’s manual and the stickers on the hitch, door jamb and glovebox as well, and don’t necessarily take the dealer’s word for it.
LIABILITY ISSUE
What the manufacturer requires in your owner’s manual, data plates and stickers on the truck, and trailer guides opens you to legal liability in the event of any incident where you were found to be towing outside those requirements.
The truck-maker may have deep pockets, but if you weren’t towing as required, it will be your pockets that get emptied.
And if your insurance company considers you operating unsafely by disregarding requirements set forth in the owner’s manual and all relevant literature, don’t expect any help from them.
As Jonathan Michaels, founding member of Michaels Law Group, which specializes in representing clients in the automotive industry, notes, “Towing regulations are governed by state vehicle codes, and they provide for specific methods of use and installation for towing mechanisms.
“Failure to comply with these varied requirements,” Michaels says, “can lead to steep civil liability for both the vehicle operator and vehicle owner under the legal theory of negligence per se.”
Consider that the polite and proper version of “you’re screwed.”
So whether or not you think your truck needs it, legal and insurance requirements dictate you use a weight-distribution setup above the pickup manufacturer’s stated trailered weights.
BENEFITS OF A W-D HITCH
If you’ve changed the ride height, springs, shocks, wheels, tires or some combination of elements, the added stability that a W-D hitch provides may be doubly welcome.
Also, adding a lot of weight to the rear axle tends to lighten the front axle, making steering touchy, less likely to return to center, and perhaps altering the geometry enough that tires will wear prematurely.
The concept behind a W-D hitch employs basic physics to balance the load on the truck more equally between front and rear axles.
Because of the lever arm effect, a 1,000-pound tongue weight applied to a tow ball located 60 inches behind the rear axle on a 160-inch wheelbase truck adds nearly 1,400 pounds to the rear axle.
Use the formula Ra=(l+wb)/wb x T (where “Ra“ is rear axle load, “l” is ball-to-rear axle length, “wb” is wheelbase and “T” is tongue weight) to calculate the numbers for your truck, and remember this weight also applies to gross axle ratings.
A W-D hitch redistributes some of that load to the pickup’s front wheels and the trailer’s.
A W-D hitch uses spring bars to do the work, so your hitch should be sized for the maximum weight of your heaviest trailer; the bars can always be removed or set to a lower tension for towing a lighter weight trailer.
Your final goal is to have the truck remain at its normal level stance with minimum drop on the rear axle, while the trailer remains level on its axles. This provides the best vehicle and trailer handling.
CHEAP INSURANCE
Using a W-D hitch when towing heavier trailers is relatively cheap insurance.
In fact, we found street prices for a complete 10,000-pound W-D setup are less than $400 while 17,000-pound systems for 2.5-inch receivers can be had for less than $600.
 When it comes to having your pickup properly set up for towing it pays to read the owner’s manual.
Installation takes less than an hour (unless your trailer’s A-frame is sealed or completely covered) with no “special” tools required except a couple of large sockets.
A W-D hitch setup will include detailed instructions, and most hitch manufacturers have such instructions on their websites.
Initial trailer setup should take a half-hour or less and add no more than a minute to hitch up the trailer once set.
So the argument using a W-D hitch costs valuable time doesn’t hold water when compared to what the liability costs could be in the case of a towing-related accident.
As a guideline here, we fitted one to a dump trailer that typically carries 2 to 4 tons of material or small skid-steer loader.

 1. Many W-D hitches use an adjustable ball-mount (a.k.a. head assembly). For most pickups and two-or-more-axle trailers you’ll set the ball height to match the coupler when the trailer is level; for single-axle trailers that are more nose-heavy, or a softly sprung half-ton, you might start with the ball a notch or two above trailer-level. The hitch head is often adjustable for angle, by square grooved washers that lock into corresponding grooves in the hitch head or with washers between the hitch head and shank held by a set-screw, so you can angle it forward or rearward if the spring bars can’t be properly tensioned otherwise.
2 With the truck at its normal ride height measure the height of the wheel well at each corner. The goal is to have the loaded front ride height remain the same as empty and the rear equal or slightly lower than without the trailer.
 3 Install one spring bar in the ball mount. This trunnion-style bar pivots in from the bottom while the lock clip at top is lifted. Round-style bars usually load from the side or bottom and are held in place with clips. Worn clips should be replaced as soon as discovered, because even a tensioned bar can fall out and the leading edge of your trailer, or load, is the first thing it will hit.
 4 Lift the chain from the bar to approximate the location for the bracket on the A-frame and snug it down. Murphy’s law dictates there is often a battery tray, jack brace or something similar where you want the bracket, but a chain within about 20 degrees of vertical should work. On a boxed-frame trailer such as this, you could drill and tap one hole on the inner side, or dual bolts on the outside, but do that only if you anticipate keeping the trailer and hitch for a long time.
 5 Measure the distance from the coupler to the first bracket and use it to locate the other side bracket the same distance from the ball. Loosely install the second spring bar to verify the bracket location and then tighten both brackets in place.
6 Remove the spring bars and lubricate the ends because they do move under load. This hitch head has oil holes on the top and we used some white lithium grease top and bottom at setup. Any time the bars are out it’s a good idea to wipe the load points clean and lube at reassembly.

 7 Place the bars back in the hitch head, lift the chain to the hook on the bracket swivel, use the supplied metal tube to lift the bracket, and slide the lock clip in over the top and lay it into position (supplied clips shown, we prefer more positive spring clips). Note: If you find lifting the chain brackets cumbersome, do them while the trailer jack is still down. Measure the truck’s height – ideally the front hasn’t moved and the back is the same height to an inch lower. If the rear axle has dropped much more or the front axle lifted, shorten the tensioned chain by a couple of links (to a minimum of five links for trailer maneuverability) and re-measure. If necessary, loosen the chains, adjust the hitch head angle and retighten the chains. Once you’ve got it set up, mark the chain link to be hooked with paint or a zip-tie to speed hookup. Different colors can be used if the trailer runs behind different trucks.
 8 The finished installation. Even empty, this heavy trailer tongue dropped this dually more than an inch. From package-open to drive-away, this W-D installation took less than 30 minutes.